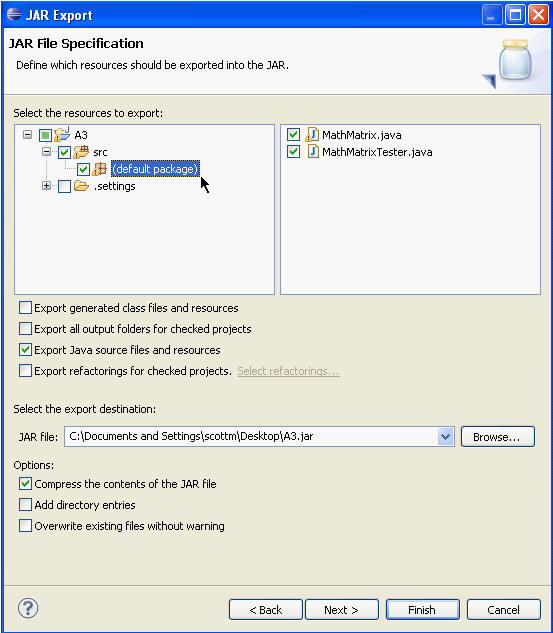
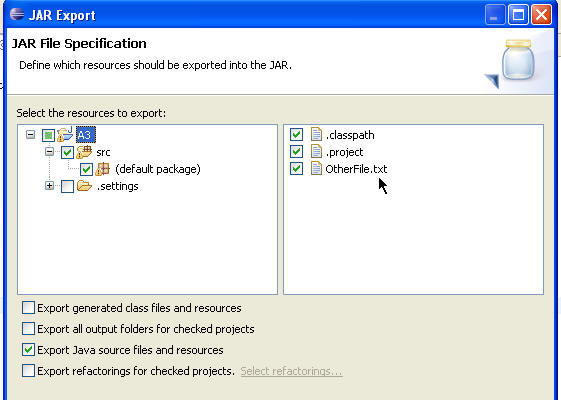
IMPORTANT: In this example the project keeps the source code in a folder named src. Your project may have a different set up. Be sure you expand the tree to show the default package and that the .java files are checked on the right. Alternatively deselect the option that says Export generated class files and resources and select the option that says Export Java source files and resources. For CS307 we want the .java files. We do not want or need the .class files. If you do not turn in your source files, the .java files, your assignment grade will be 0.
If there are other files or resources you want to include they must be in a an open project. Browse to their location via the directory tree on the left and ensure the file or resource is checked in the window on the right. In the example below we are including a file named OtherFile.txt which is located in the A3 directory.
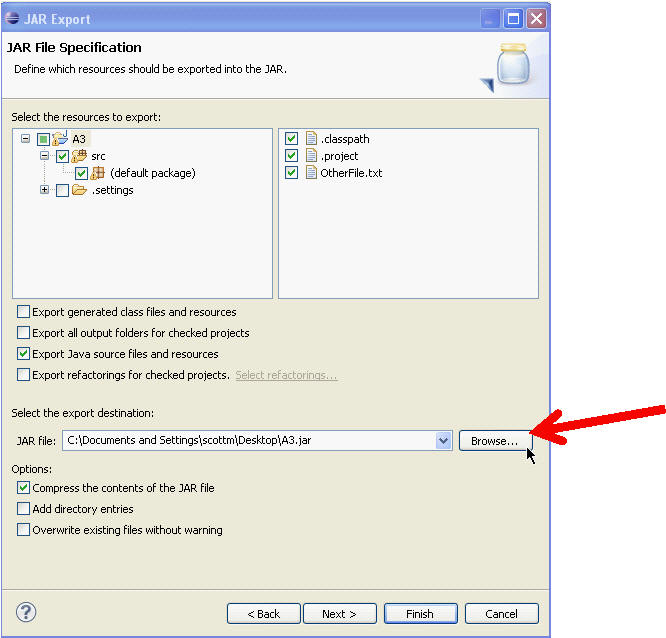
- Click Finish to create the JAR file immediately.
- Click Next to use the JAR Packaging Options page to
set advanced options, create a JAR description, or
change the default manifest.
Go ahead and click finish.

One easy way of checking if the jar has the correct files is to rename it with a .zip extension. Then use whatever you zip program is to look at the files inside. (This may not work depending on how your system is set up.)
Rename to .zip extension:

Open up with zip program / utility.
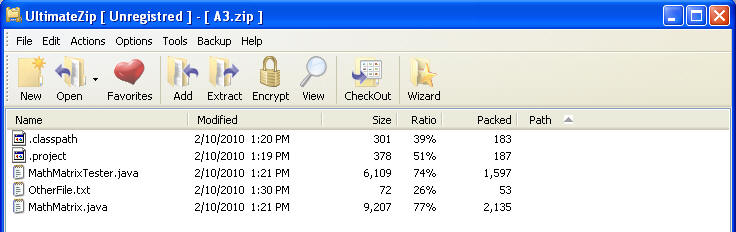
In the above image you can see that A3.jar (renamed to A3.zip) contains 2 files MathMatrix.java and MathMatrixTester.java. Realize you may have multiple copies of those files on your computer. You can unzip the file (in a location different from where the files were originally located!!) and open the .java files to ensure they are correct or compare the size of the files to the size of the originals. Alternatively you can unjar the jar file, again in a different location that the original .java files, and check the files.
If you changed the extension to .zip you must change it back to .jar before submitting your file via turnin.